
Billing
What is Billing?
Billing in TMS is the process of paying the transporter for completed shipments. Once a transporter delivers your goods, they raise an invoice based on agreed charges. You review and approve the invoice, and then make the payment.
When does Billing happen?
Billing starts after the delivery is done and the Proof of Delivery (PoD) is uploaded.
How Billing Module Works?
The Transport Management System (TMS) automates and simplifies the billing process for you. It brings all shipment charges, invoices, approvals, and payments into one place — so nothing gets missed.
- Shipment Completion
After a shipment is delivered, the transporter marks the load as “Delivered” in TMS. - PoD Upload
The Proof of Delivery (PoD) document — signed by the receiver — is uploaded. This confirms the shipment is complete and ready for billing. - Charges Become Billable
Based on the shipment details and your contract, TMS calculates the expected charges. You can also add or edit charges manually if needed. - Invoice Creation
The transporter selects eligible shipments and submits an invoice in TMS. They can attach a signed invoice and any supporting documents. Transporters use the TMS to generate invoices based on completed shipments, including agreed-upon rates, accessorial charges (like detention or loading/unloading), and deductions (like penalties or damage claims). - Invoice Review & Approval
You review the invoice line-by-line in the Approval Panel. If everything is correct, you approve it. If not, you can reject it with comments. - Payment & Status Update
After approval, you make the payment outside TMS and upload payment details. TMS updates the invoice status to “Paid” or “Partly Paid.” - Payment Recording (Billed Section): You record payment information in DelhiveryOne to update invoice statuses and maintain a complete financial record within the TMS.
- Reports & Downloads
You can track all billing activity through reports, and download invoices and supporting documents whenever needed.
The Billing module ensures efficient payment processes from shippers to transporters while meeting essential conditions before releasing funds. This system streamlines invoicing, reduces delays, and ensures accurate charges and penalties. This guide provides step-by-step instructions for shippers on managing invoices and payments within the Transport Management System (TMS).
- Streamlining the payment process between shippers and transporters.
- Ensuring payments are processed only after delivery completion.
- Automating the inclusion of ancillary expenses in payments.
- Applying penalties for damages, shortages, or SLA breaches.
- Ensuring invoices comply with GST regulations and are properly acknowledged.
- Reducing the payment cycle duration.
What Types of Charges Are in the Invoice?
| Type | Meaning |
|---|---|
| Freight Cost | Basic transport fee (auto-calculated) |
| Detention | If truck waited too long at origin/destination |
| Loading/Unloading | Manual charges added if applicable |
| Transit Delay Penalty | If delivery was late (deduction) |
| Damage or Shortage | Goods were damaged or missing (deduction) |
| Other Charges | Any special or extra costs agreed |
You can review and update these charges before approving the invoice.
Using Billing Module
This guide focuses on two key aspects for shippers:
Billed
The Billed section is your centralized dashboard to view and manage all invoices. It shows a summary of:
The total number of invoices
- Invoice statuses (e.g. Draft, Approved, Paid)
- Payment amounts
- Transporter-wise invoice history
Accessing Billing
To view invoices:
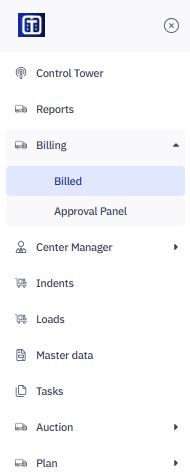
- Navigate to the Billing section > Billed.
- Use filters to search by invoice number, status, transporter, or date range
Viewing Invoice Information
The "Billed" section provides a comprehensive overview of all invoices related to your shipments and how shippers can use the billing module in TMS to manage invoices and payments with transporters.
This section provides an overview of all invoices and allows you to manage payments.
Filtering and Searching Invoices
You can use filters to find invoices quickly. Use these to narrow down the invoices you want to view.
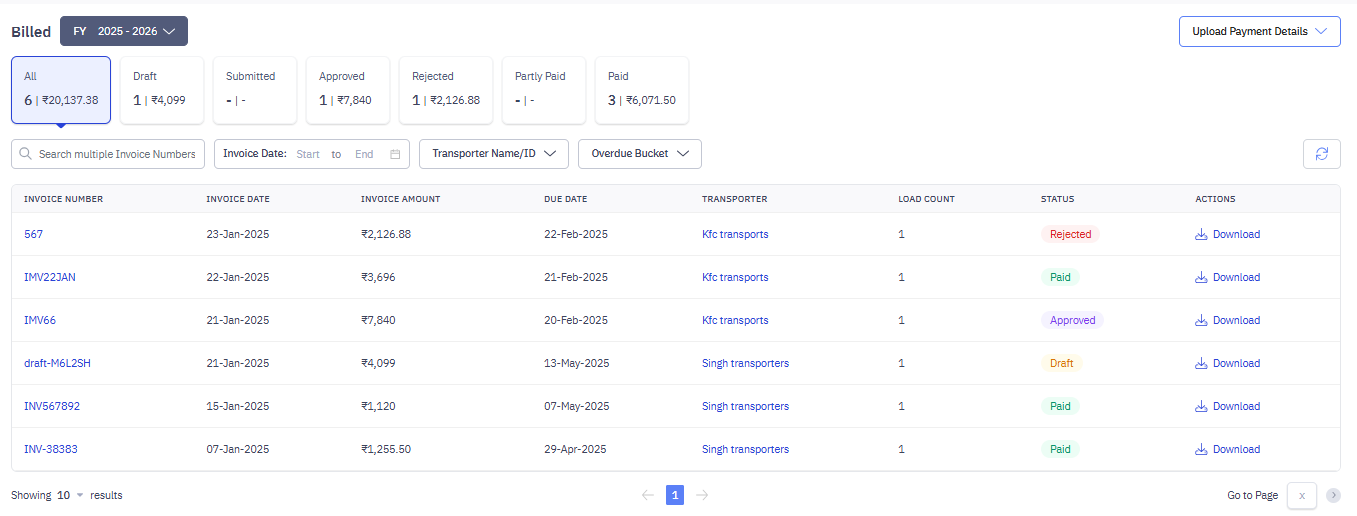
- FY (Financial Year): Select the relevant financial year. Example:
FY 2025-2026. - Status Filters: Filter by invoice status:
- All: Displays the total number of invoices and the combined amount for all invoices.
- Draft: Shows invoices in draft status with the total amount.
- Submitted: Displays invoices submitted for approval.
- Approved: Indicates the count and total amount of approved invoices.
- Rejected: Highlights the count and total value of rejected invoices.
- Partly Paid: Displays the count of partially paid invoices (if any).
- Paid: Lists paid invoices with the total amount paid.
The counts and total amounts for each status are displayed. Example: 6 ₹20,137.38 for All invoices.
Search Multiple Invoices
- Search by multiple invoice numbers.
- Filter by invoice date, transporter name/ID, and overdue bucket.

- Invoice Date (Start to End): Filter by date range.
- Transporter Name/ID: Filter by transporter.
- Overdue Bucket: Filter by overdue status (this is important for tracking outstanding payments).

Viewing Invoice List
This table displays key information for each invoice.

- Invoice Number: Unique identifier for each invoice.
- Invoice Date: Date when the invoice was generated.
- Invoice Amount: Total amount of the invoice.
- Due Date: Payment deadline.
- Transporter: Name of the transporter.
- Load Count: Number of loads associated with the invoice.
- Status: Indicates the invoice status (e.g., Draft, Approved, Rejected, Paid).
- Actions: Option to download the invoice.
Viewing Invoice Details
To view invoice-specific information:
Once invoices are generated and listed, users may want to review specific invoice details such as shipment information, payment status, or supporting documents.
1. Click on any Invoice Number to open the invoice detail page or use the search or filters to find the specific invoice based on invoice number, transporter name, date range, or status.
2. This opens the Invoice Details page with 3 key tabs:
- Invoice Preview & Timeline
- Loads
- Payment Details
You can view the following details on the invoice page.

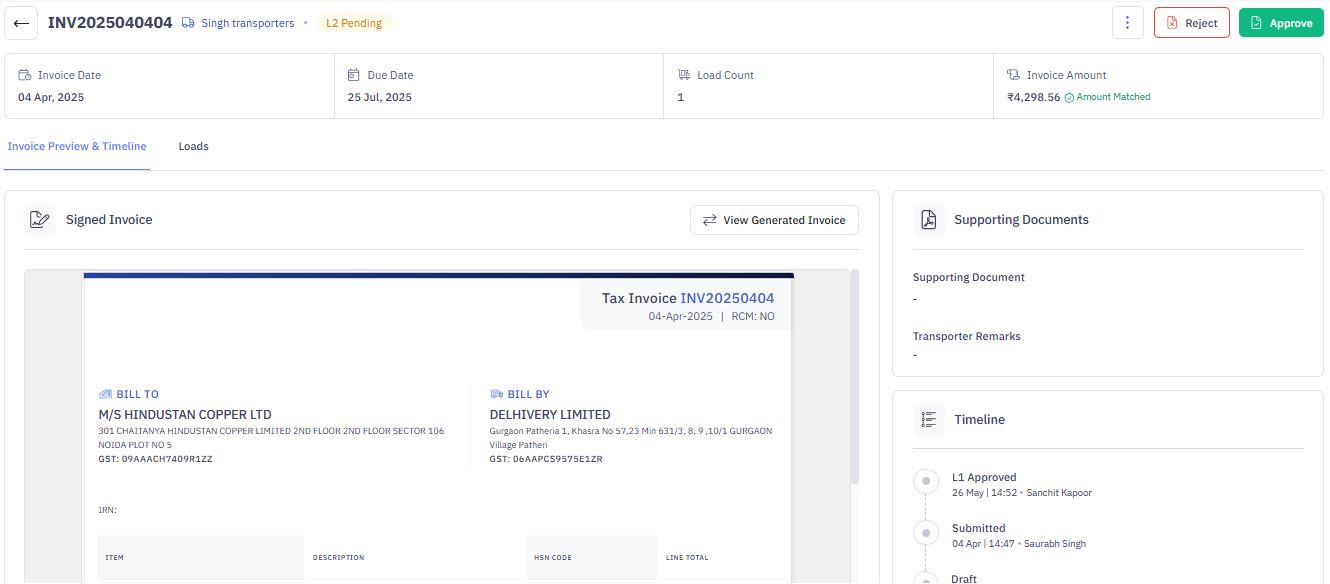
Info: On the top of the page, you can view the following:
- Invoice Date: The date the transporter created the invoice (e.g., 15-Jan-2025).
- Load Count: The number of shipments covered by this invoice (e.g., 1). If a transporter handled multiple shipments for you and invoiced them together, this number would be higher.
- Invoice Amount: The total amount of the invoice (e.g., ₹1,120 Amount Matched). The phrase "Amount Matched" means the invoiced amount is the same as what Delhivery One calculated. If there was a difference, it would be shown here (as a "Diff Amount," as seen in previous examples).
- Paid Amount: The amount you've paid towards this invoice (e.g., ₹1,120). In this example, the invoice is fully paid
2.1. In the Invoice Preview & Timeline:
- View the signed invoice copy.
- Click View Generated Invoice to see the system-created version
- Check the timeline of invoice activities such as: submission, approval, and payment status.
- Review any transporter remarks or supporting documents attached.
- From the right panel, download the supporting documents the transporter has uploaded to support the invoice (e.g., doc-1). Click the document name to download it. This is useful for verifying charges.
2.2 Check Load Information:
- Navigate to the Loads tab to view details of shipments billed under the invoice.
- Verify route information, truck details, POD status, and contract references.
2.3 Payment Details tab: Verify Payment Details:
- Switch to the Payment Details tab to view recorded payments against the invoice.
- Check payment ID, mode of payment, payment amount, and reference numbers for accuracy.
Review and approve bills
Before you (the shipper) can review or approve an invoice, the transporter first generates it from their side using the “Ready to Bill” screen. Once the shipment is delivered and all Proofs of Delivery (PoDs) are uploaded, the transporter selects eligible loads, reviews the billable charges, and enters the required invoice details. They then upload a signed invoice and any supporting documents (such as PoD files or additional justifications) and submit the invoice for your review.
After submission, the invoice becomes visible to you in two places:
- Under the Billed section, where its status appears as Submitted
- In the Approval Panel, if the invoice is pending your review or approval
- This process ensures that you receive complete and verified information before moving forward with approval and payment.
Info: Transporters must have their GST details configured before generating invoices. Otherwise, submission will be blocked.
You can now proceed to review these submitted invoices through the Approval Panel.
Reviewing Invoices via the Approval Panel
Once a transporter submits an invoice, you’ll receive it for review in the Approval Panel. This is where you can check the details, verify charges, and either approve or reject the invoice.
Depending on your organization’s billing workflow, you may have one or two levels of approval — commonly referred to as L1 (Level 1) and L2 (Level 2). If both levels are configured, the invoice must be approved in sequence.
Accessing the Approval Panel
To view pending invoices for review:
- Go to Billing > Approval Panel from the left navigation.
- You’ll see a list of invoices that are awaiting your action.
- If you’re an L1 approver, you’ll see invoices in L1 Pending status.
- If you’re an L2 approver, you’ll see those in L2 Pending.
- If you hold both roles, you’ll see both.
By default, invoices with the highest difference between system-calculated and transporter-proposed amounts appear at the top.
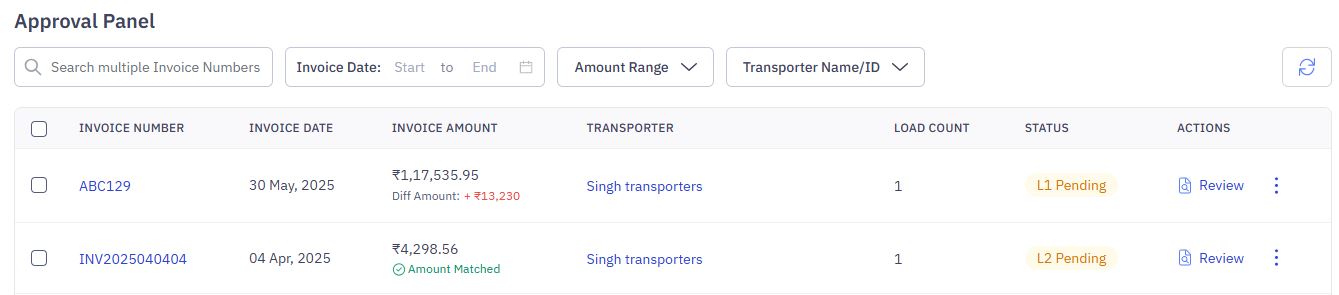
Filtering Invoices
Use filters to narrow down invoices:
- Invoice Number: Single or comma-separated values
- Invoice Date Range
- Transporter Name/ID
- Status: L1 Pending or L2 Pending
Reviewing and Approving an Invoice
- Click the Invoice Number to open the full invoice details.
- Review the summary at the top — including Invoice Date, Load Count, Amount, and Paid Amount (if any).
- Review each load under the invoice:
- Expand load rows to compare system-calculated vs transporter-proposed charges.
- View supporting documents, PoDs, and transporter remarks.
- If any charge looks incorrect, flag it and select a reason (e.g., Incorrect freight amount, Missing PoD).
Taking Action: Approve or Reject
After reviewing:
- Click Approve to move the invoice to the next approval level or mark it as Approved.
- Click Reject to send it back to the transporter. You'll be asked to:
- Select reasons for rejection (at charge or invoice level)
- Optionally, add comments for clarity
Once an invoice is approved at all required levels, it becomes eligible for payment.
Viewing the Timeline
On the right side of the invoice page, you’ll find a Timeline section that tracks:
- Invoice submission
- L1 and L2 approvals
- Payment uploads (if done)
This timeline helps provide a clear audit trail of who acted on the invoice and when.
Note: You can always return to a previously reviewed invoice by searching for it in the Billed screen.
Uploading Payment Details
Once the invoice is approved and you've paid the transporter offline (e.g., via bank transfer), you must update TMS with payment details.
How to Upload Payment Info:
- Go back to Billed screen.
- Click Upload Payment Details on the top right of the Billed screen.
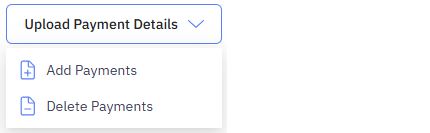
2. Click Add Payments.
- Upload a CSV/Excel file with the following fields:
- Invoice Number
- Payment ID (unique identifier)
- Payment Date
- Payment Type (e.g., cash, debit note)
- Applied Amount (amount applied to this invoice)
- Reference Number (e.g., bank UTR)
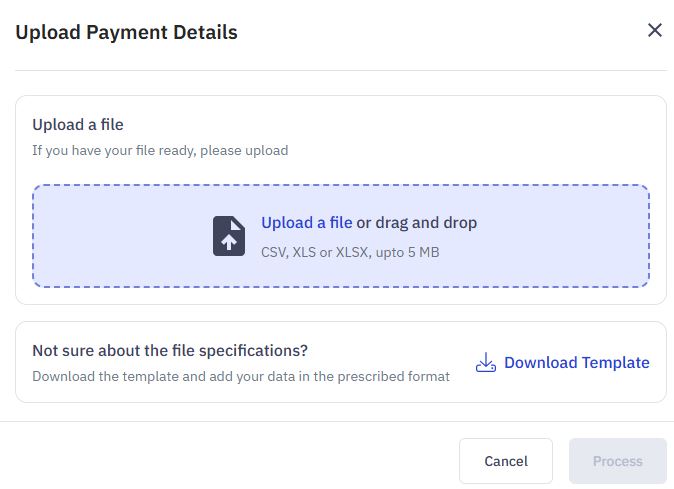
After upload, the invoice status updates to Paid or Partly Paid
Optional Actions
- Download: In the Actions column or on the invoice page, download the generated invoice for record-keeping.

- Delete Payment: If incorrect payment was uploaded, you can delete it using the "Delete Payments" option.

- Transporter Remarks: View any comments the transporter has added to the invoice (e.g., AN).
- Timeline Section: This shows a history of actions taken on the invoice.
- Paid: Shows when the invoice was marked as paid and who recorded the payment (e.g., 16-Jan 20:35 Bytem).
- L2 Approved: Shows when the invoice received Level 2 approval and who approved it (e.g., 15-Jan 20:20 Shivam Singh).
- L1 Approved: Shows when the invoice received Level 1 approval and who approved it (e.g., 15-Jan 20:20 Shivam Singh).