
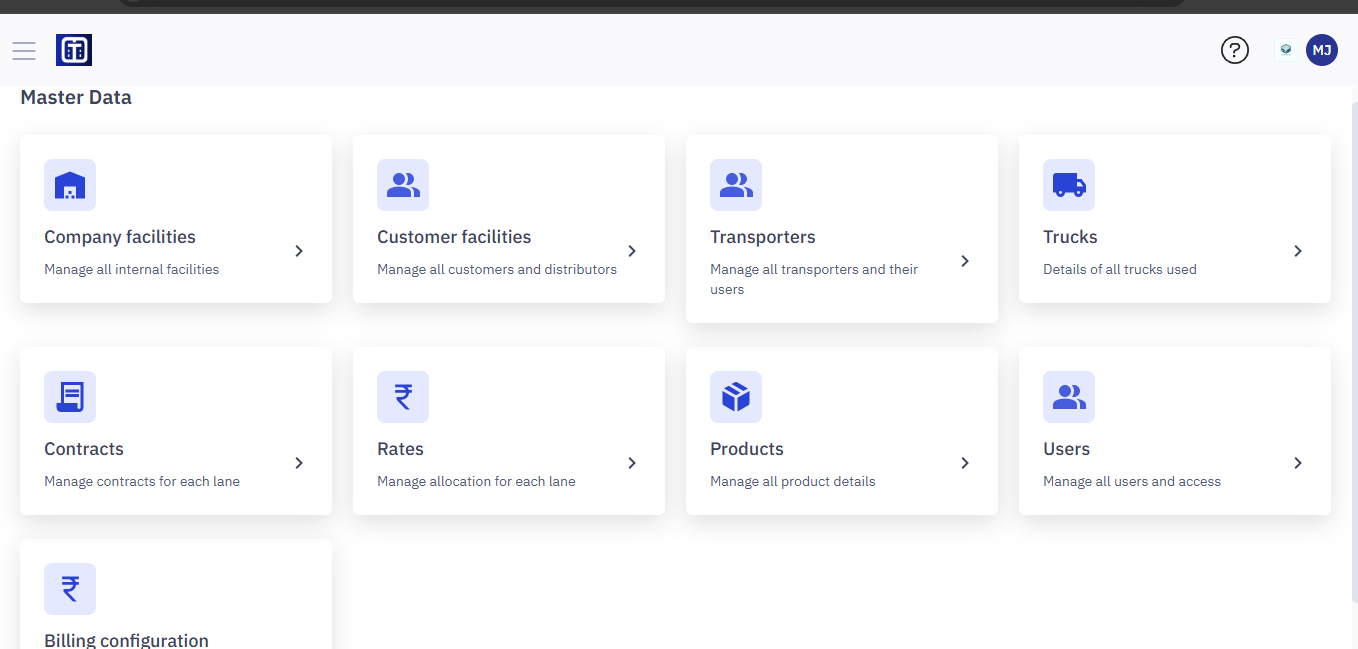
Manage Customer Facilities
The Customer Facilities section lets you manage details about your customers' delivery or pickup locations.
Accessing Customer Facilities
From the Master Data dashboard, click Customer facilities.
- See the "Master Data Information: Key Details for All Submodules" section for important information about adding facilities and ERP integration.
View the Customer Facilities List
The Customer Facilities page displays a list of existing facilities in a table. The table shows:
- REFERENCE ID: A unique ID for each facility.
- FACILITY NAME: The name of the facility.
- FACILITY TYPE: The type of facility (e.g., Distributor, Customer).
- CITY: The city where the facility is located.
- STATE: The state where the facility is located.
- CONTACT DETAILS: Basic contact information. Some details might be partially hidden for privacy.

Searching for a Facility
Search for a specific Facility:
- In the "Search by Reference ID or Facility name" box, enter part of the ID or name.
- The list updates automatically to show matching results.

Filter by Facility Type:
- Click the Facility Type dropdown.
- Select a facility type (e.g. Customer, Distributor). The list filters to show only that type.

Adding a New Customer Facility
The Create Facility screen allows users to input the necessary details for creating a new facility within the TransportOne platform.
To create a new facility, follow these steps:
- Click
.
- Fill out the form with the facility's details (name, address, contact information, etc.). The form is divided into four main sections: Basic Details, Address Details, Operating details, Other details.
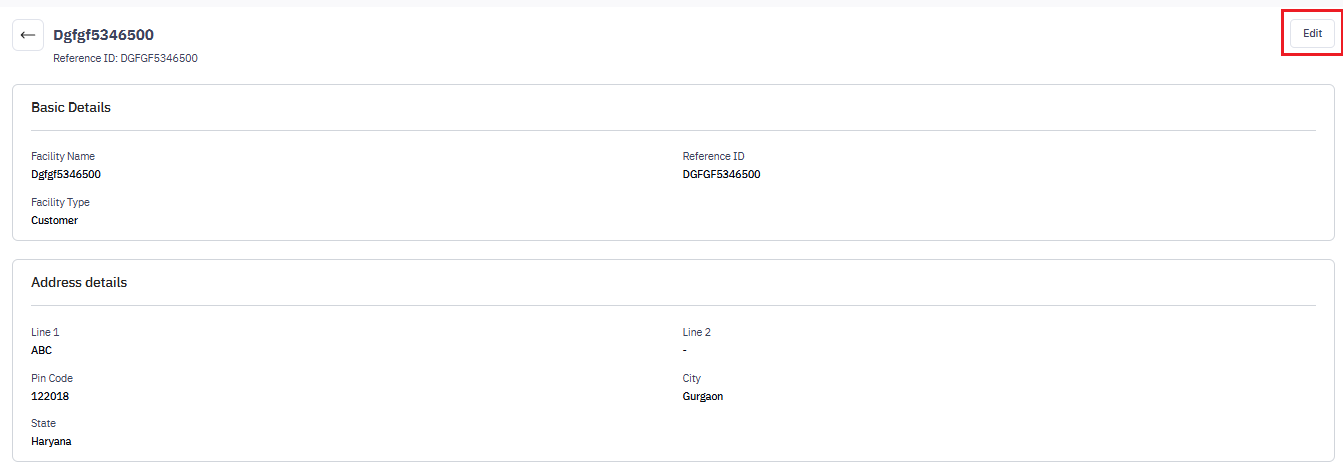
- In Basic Details, provide key identifiers and characteristics for the facility.
- Facility Name (Required): Enter the name of the facility (e.g., Mumbai Warehouse). This is a required field.
- Reference ID (Required): Provide a unique identifier for the facility. This could be an internal ID or any other relevant reference. This is a required field.
- Facility Type (Required): Select the type of facility from the dropdown (e.g., Warehouse, Distribution Center). This is a required field.
- In Address Details, provide the address of the facility:
- Line 1 (Required): Enter the primary address line (e.g., building number, street). This is a required field.
- Line 2 (Optional): Enter additional address details (optional).
- Pin Code (Required): Input the postal code of the facility. This is a required field.
- City (Required): Specify the city where the facility is located. This is a required field.
- State (Required): Select the state from the dropdown list. This is a required field.
- In Basic Details, provide key identifiers and characteristics for the facility.

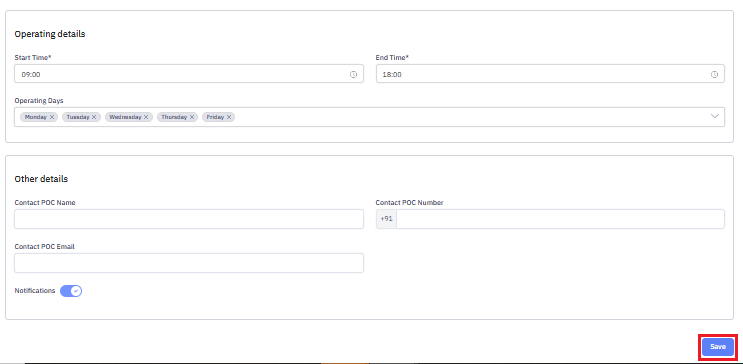
3. In Operating Details, define the operating hours and working days for the facility:
1. Start Time (Required): Enter the time when the facility begins its operations (e.g., 09:00 AM). This is a required field.
2. End time: Required): Enter the time when the facility ends its operations (e.g., 06:00 PM). This is a required field.
3. Operating Days (Optional): Select the days the facility operates from the dropdown list (e.g., Monday to Friday). Multiple days can be selected based on your facility's schedule.

4. Click Save.
5. You will get the pop up message confirmation for the newly created facility, and this facility will appear at the top of all facilities.

Uploading Facilities at bulk
The Facility Upload feature allows you to add multiple facilities at once using a bulk upload process. You can create more than one facility at once.
To add bulk facilities, follow the below steps:
- Navigate to the
.
- Download the Template
- Click on Download Template to obtain the standard CSV file format.
- The template contains predefined columns for the required data fields.
- Prepare the Data
- Fill in the facility details in the downloaded template.
- Ensure all required fields are completed as per the format guidelines provided in the template.
- Save the file in CSV, XLS, or XLSX format (maximum file size: 5 MB).
- Upload the File
- Drag and drop the completed file into the upload area, or click Upload a file to select it manually.
- Once the file is uploaded, click Process.

5. You will get the pop-up message confirmation for the newly created bulk facility, and this will appear at the top of all facilities, similar to the section Adding a new customer facility.
Viewing and Editing Facility Details
- Click on any reference ID in the list to view or edit a facility's details.

2. Click 
3. Modify details as per your requirements.

4. Click Save to save your changes.
5. The modified facility will be updated and appear in the list of facilities.