Planning
The Planning module in the Transport Management System (TMS) helps shippers organize and plan shipments before dispatch. It ensures shipments are optimized, reducing delays and improving efficiency.
Before you begin, make sure all shipment orders are uploaded to the system. The system needs details like the destination, load type, and dispatch date to create shipment plans.
This guide walks you through accessing the module, uploading orders, and initiating shipment plans.
This guide walks you through logging in, uploading order files, and initiating shipment planning with step-by-step instructions.
Upload Orders
In planning module, you can create or upload bulk orders.
To upload bulk orders, follow the steps below:
1. Sign in to the TransportOne portal.
2. Navigate to the Plan module.

3. From the Order screen, do the following:
- Set up your facility (one-time setup).
- Search for your facility in the top bar.
- Select the facility name from the dropdown.
4. Click 
5. Download the order template.
- We have provided the template for you to understand how to fill in the order details.
6. Open the downloaded CSV file and fill in the required details:
- Order ID
- Destination
- Load Type
- Dispatch Date
7. Save the file as a CSV.
8. Click Upload a file or drag and drop it into the upload area.
9. Click 

A pop-up will show your file’s progress.
- Click View Details to check the status. Or,
- Go to Tasks module and refresh the page once processing is complete.

Your order file is uploaded successfully.
Initiate Plan
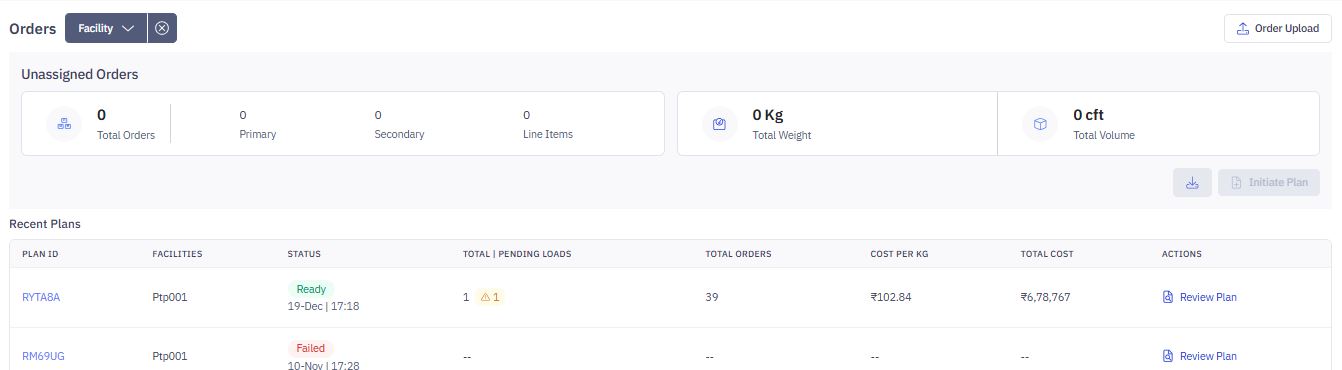
1. Go to the Orders page to see the uploaded orders.
2. Click Initiate Plan.

3. Fill in the details:
- Expected Dispatch Date & Time – Select when the shipment should leave.
- Movement Type – Choose All or a specific type (e.g., inbound, outbound).
- Min Weight Utilization (%) – Set the minimum truck weight to be used.
- Min Volume Utilization (%) – Set the minimum truck space to be used.
- Order Split
- Off: Keeps each order in one shipment.
- On: Splits orders into multiple shipments.
- Customer Split
- Off: Ships everything for a customer together.
- On: Splits a customer's shipment if needed.
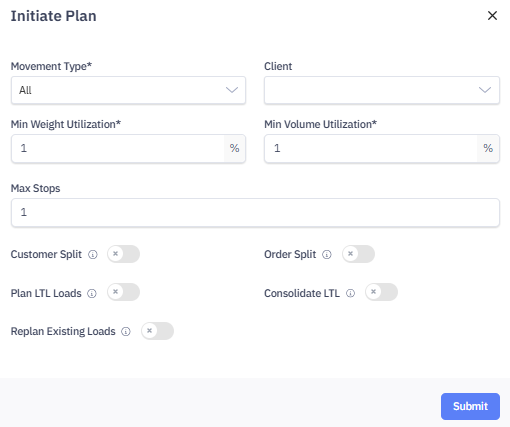
4. Click Submit.
5. A confirmation message appears.

6. The plan will now show under Recent Plans as In Progress.

6. Click Reload to refresh the status.
7. When the status changes to Ready, you can create a load.

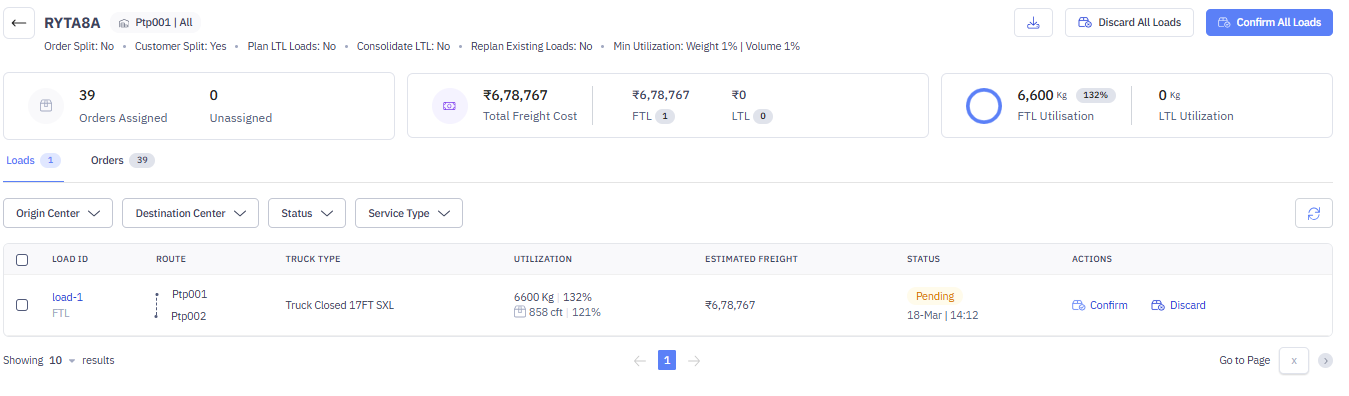
8. Click Plan ID. You can view all the details of recently added plan.

- Review plan ID, origin and destination centered
- See order summary (assigned/unassigned)
- Check total freight cost (FTL/LTL breakdown)
- View utilization by weight and volume
- Navigate between Loads and Orders tabs
- Perform actions like Confirm or Discard loads individually or in bulk
View Plan output
You can view and download the plan output that gives you complete information of your recently created plan. Click 
Confirm or Discard load
1. Click Plan ID.
2. You can view all the details of recently added plan.
- Review plan ID, origin and destination centered
- See order summary (assigned/unassigned)
- Check total freight cost (FTL/LTL breakdown)
- View utilization by weight and volume
- Navigate between Loads and Orders tabs
- Perform actions like Confirm or Discard loads individually or in bulk
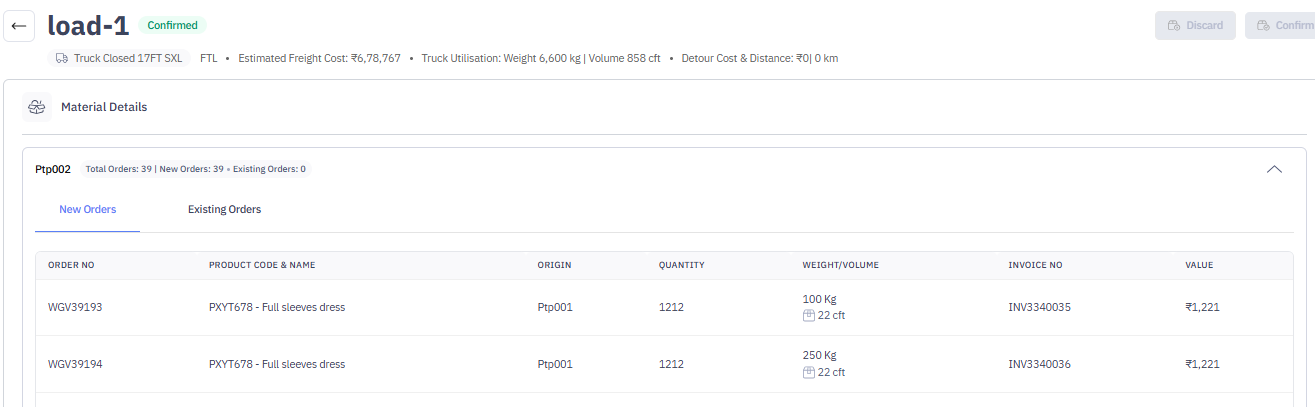
2. Click Confirm or Discard for a single load. Review load details and choose to either confirm the load for execution or discard it if not required.
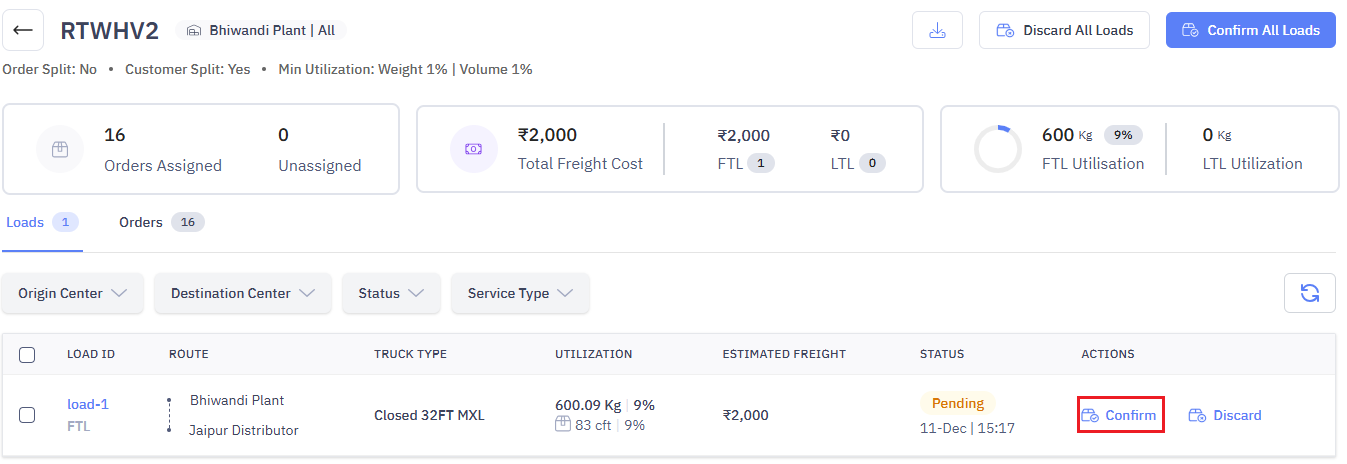
3. Click Confirm All Loads to confirm multiple loads.

4. You will see the confirmation message "All loads have been created successfully”.
5. You can also view the loads details by clicking on the View Load to check shipment details.

6. View load details screen. This screen shows the key details of a delivery load.