
New Planner
The Planner module in TransportOne helps users create optimal shipment plans across FTL, LTL, and milk run movements. It enables planners to consolidate multiple orders based on key parameters like origin, destination, vehicle type, and product compatibility — all while optimizing for cost and service level.
This guide walks you through the revamped Planner experience, covering every step from uploading orders to confirming loads, so you can plan and execute shipments efficiently.
Who Should Use This Guide?
This guide is meant for:
- Primary Planners
- Admin users
Any shipper team members involved in load planning, consolidation, and transportation initiation.
What You'll Learn
By the end of this guide, you will be able to:
- Upload and view unplanned orders
- Trigger planning using default or custom constraints
- Review and edit load plans
- Confirm loads through indents, manifestations, or spot auctions
- Replan and compare plan versions when needed
Accessing the new planner
1. From the left navigation menu, go to Plan > Planner.
2. You will land on the Planner page, which has three tabs:
- Unplanned Orders – View and select orders that need planning.
- Plan – Review the system-generated or manually triggered load plan.
- Confirmed Loads – Track loads that have been confirmed or sent to execution.
By default, the Planner opens on the Unplanned Orders tab where you upload orders to initiate the planning
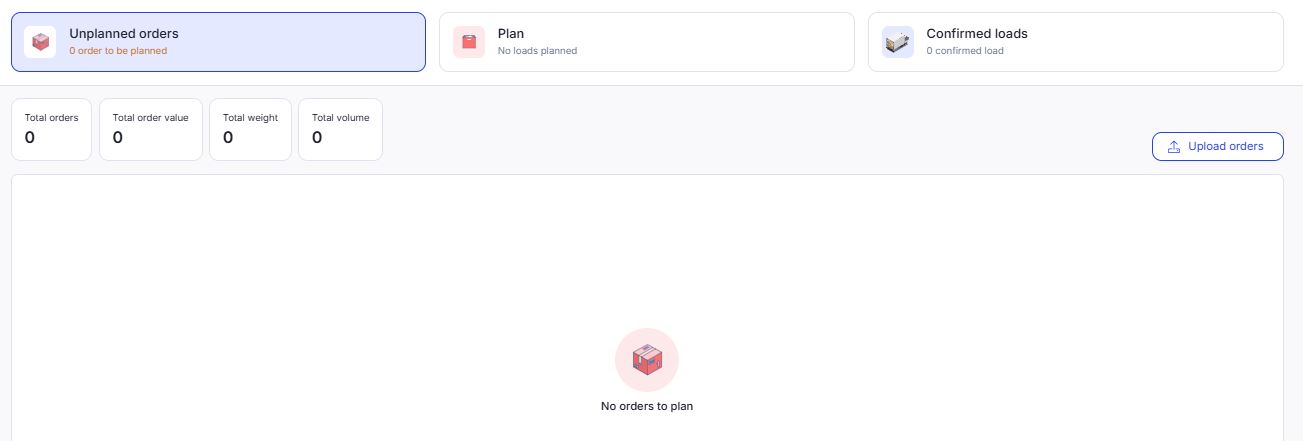
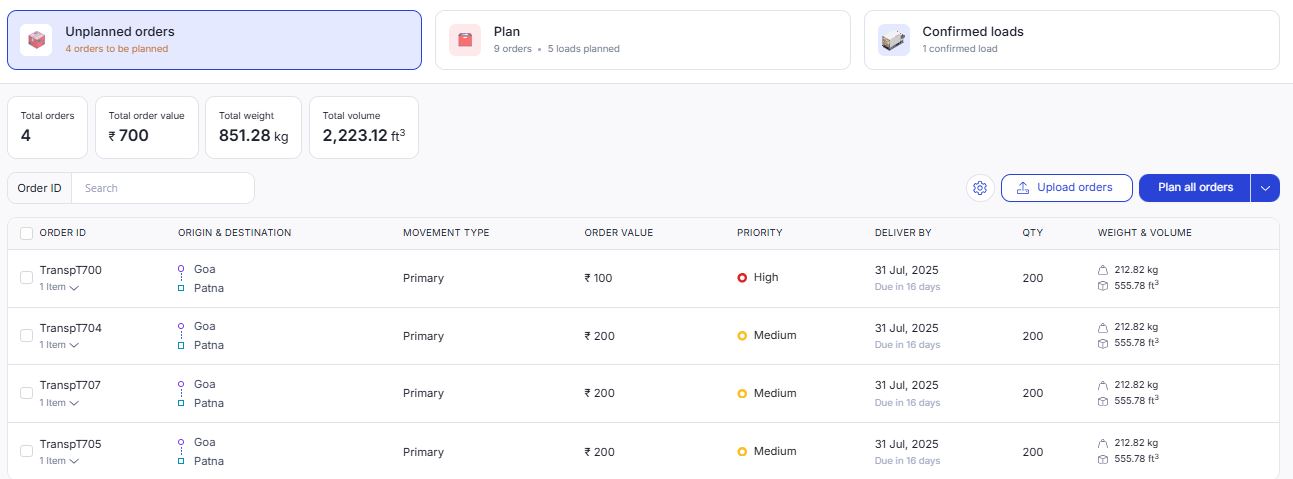
Step 1: View Unplanned Orders
When you land on the Unplanned Orders tab, you will see a list of all orders that are currently unassigned to any load and are ready to be planned. The page may initially appear blank if no orders exist for the selected facility.
1. Select Facility
At the top of the page, use the facility dropdown to choose the plant, warehouse, or customer facility for which you want to plan orders.
The orders displayed are specific to the selected facility. Make sure you’ve chosen the correct one.
What You’ll See:
- A summary of total orders, order value, weight, and volume.
- A table listing each unplanned order with key details:
- Order ID
- Origin & Destination
- Movement Type (Primary/Secondary)
- Priority
- Quantity
- Weight & Volume
- Delivery Date
If an order has multiple line items, you can click the arrow icon to expand and view item-level details.
Before this screen appears, you’ll select a facility (e.g., plant, warehouse, or customer) whose orders you want to view and plan.
Once that’s covered, your next section is:
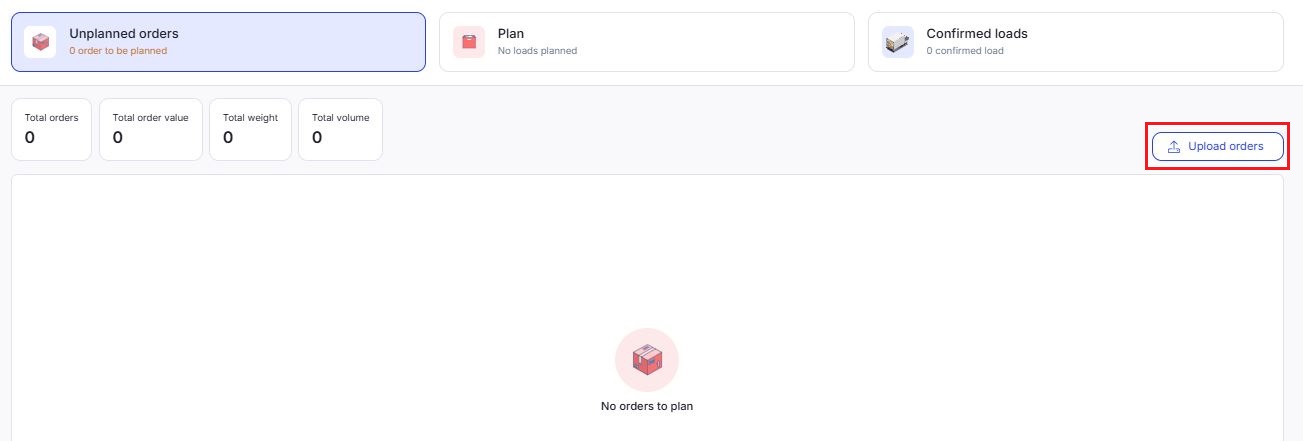
Step 2: Upload Orders
If your setup allows manual uploads (non-ERP tenants), follow these steps:
1. Click Upload orders on the top right.
2. In the modal that appears, either:
- Drag and drop your
.csvfile - Click Browse to select the file. File must be:
- In
.csvformat - Under 5 MB in size
- In
5. Click Download sample template to get the required headers.
6. Fill in the data and click Upload.
7. After uploading:
- The orders will appear in the unplanned list within 1–2 minutes
- You can then select and proceed with planning.

Step 3: Initiate Planning
1. Once your bulk order list appears in the Unplanned Orders tab, you can begin the planning process.
- Plan all orders in one go
- Plan only selected orders
- Manage individual orders or line items before planning
Option 1: Plan All Orders Together
Use this option when you want to plan all available unplanned orders in bulk.
1. Select the facility from the dropdown at the top.
2. Verify that uploaded orders appear in the Unplanned Orders tab.
3. Click Plan all orders at the top right to trigger planning with default configurations. It will plan all the orders appear in the unplanned tab.
Or
If you want to configure constraints before planning, follow the below steps.
- Click the dropdown arrow next to Plan all orders.
- Select Configure and plan.
- Set constraints like:
- Max stops, Plan LTL, Consolidate LTL, etc.
- Replan existing loads
- Order split, Customer split
- Minimum utilization
- Max stops, Plan LTL, Consolidate LTL, etc.
- Click Plan all orders to start planning for all listed orders.
- The system will use the default planning constraints configured at the tenant level.
- You will be redirected to the Plan tab once planning is complete.
Option 2: Plan only for selected orders
Alternatively, you can initiate plan for only selected order.

1. Select specific orders and use the dropdown next to Plan Orders.
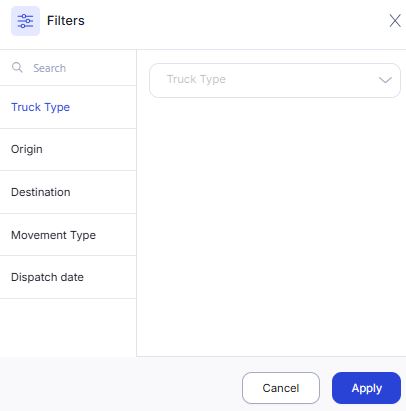
2. Select Configure and plan. A modal will open, where you can customize the following constraints:
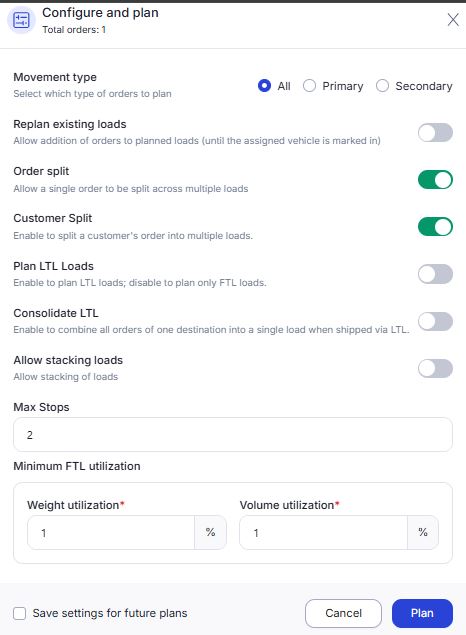
3. Click Plan if you want to initiate it now. Or you have the option to save the configuration for future plans.
4. You’ll be redirected to the Plan tab with results only for the selected orders.
Option 3: Manage individual orders or line items before planning
If you want to check or modify orders before sending them for planning:

- Expand a single order by clicking the arrow icon next to it.
- You can now:
- View line items (Item ID, quantity, weight, etc.)
- Click the 🗑️ Delete icon to remove a specific line item from the order
➤ This is useful for removing invalid or non-shippable items before planning
After review, you can still proceed to plan that order (via Option 2).
Tip: The top summary bar updates based on your selection — showing total orders, value, weight, and volume being sent for planning.
Step 4: Review Planned Loads
Once planning is initiated, the system begins processing your selected orders and generating load plans. While planning is in progress, you’ll see a message:
“We are generating plans for you. In the meantime, you can continue with your tasks.”
After a few seconds, the Plan tab screen appears with a table listing all the planned loads.
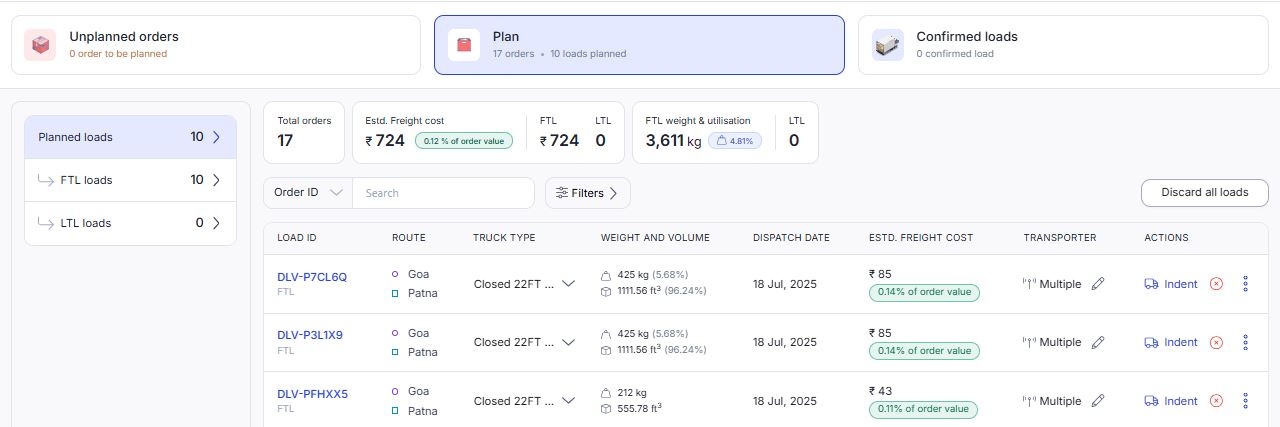
View Order Summary
- At the top of the screen, you’ll see a summary of your planning run:
- Total Orders: Number of orders considered during planning
- Estimated Freight Cost: Combined estimated cost for all planned loads
- FTL Utilization: Truck utilization efficiency for Full Truck Loads
This gives you a quick view of how effective the planning run was.
Find Specific Loads
You can easily search or filter loads using the tools provided at the top:
- Order/Load ID dropdown:
Quickly locate a load using either the Load ID or the Order ID.
The dropdown is searchable and helps you jump directly to a specific load.

- Filters: To narrow down loads based on route, truck type, etc. Use available filters to narrow down the list based on Origin, Truck Type, Movement Type, Destination, Dispatch date.
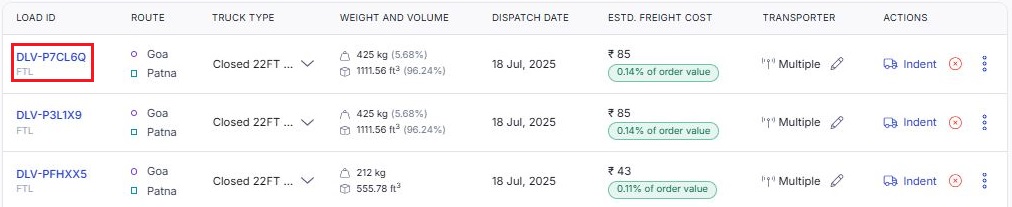
Understand the Load Table
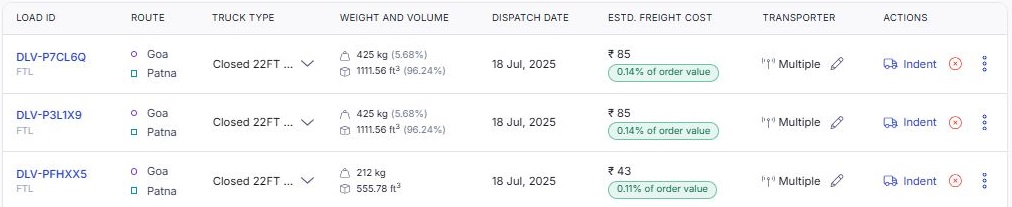
Each row in this table represents a load generated from your selected orders. Key information shown includes:
| Column | What It Shows |
|---|---|
| Load ID | A unique system-generated ID for each load. It is clickable and leads to load-level details. |
| Route | Displays the origin and destination of the load. |
| Truck Type | The type of truck required for the load (e.g., Closed 22FT). |
| Weight and Volume | Shows the total weight (kg) and volume (ft³) of the load, along with utilization percentage. |
| Dispatch Date | The planned dispatch date for the load. |
| Estimated Freight Cost | Estimated transportation cost, with percentage of order value shown in green. |
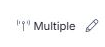
| Transporter | Displays assigned transporter(s). If it shows Multiple, you can click the ✏️ icon to view or edit the list. |
| Actions | Includes direct actions like indenting the load or accessing additional options via a three-dot menu. |
Additional Options:
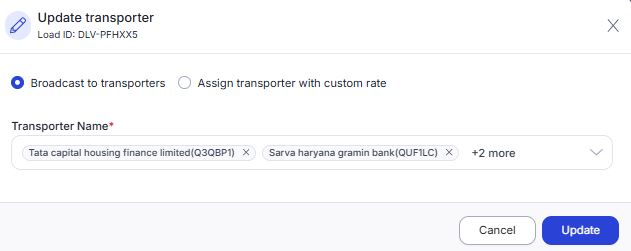
- Update Transporter (Edit Option)
When the transporter is listed as "Multiple", click the ✏️ icon to open the Update Transporter window.
- You can either broadcast the load to multiple transporters
- Or assign a specific transporter with a custom rate.
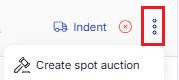
2. Three-Dot Menu (⋮)
Located under the Actions column next to Indent. Clicking it opens additional options such as:
- Create Spot Auction – Allows you to start a bidding process to assign a transporter competitively.
You can scroll horizontally to view all load-level details.
3. View Load ID details
1. Click Load ID from the Plan tab.
2. When you click on a Load ID from the Plan tab, it opens the Load Detail Page. This page helps you review and finalize the load before confirming or indenting.
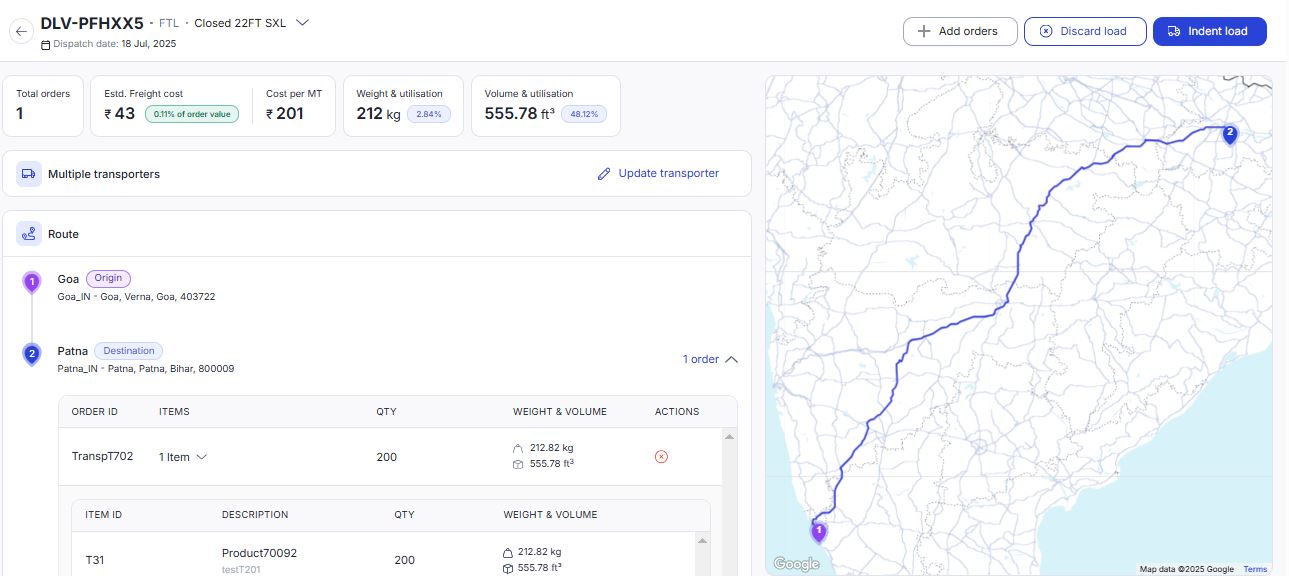
- Review full load details
Check the load ID, dispatch date, truck type, and load summary (freight cost, weight, volume, etc.). This helps you ensure everything looks right before taking action. - See the exact route
The map shows the planned route from origin to destination so you can visually verify the movement path. - View all orders in the load
For each order, you can see what’s inside (items, weight, volume) and remove any order if needed. - Check and update the transporter
If needed, clickto assign a new one or review the existing assignment.
- Take final actions
Use the top buttons to:- Add more orders to the load
.
- Discard the load if it's not valid
.
- Indent the load to move it to the next stage
.
- Add more orders to the load
This page gives you full control to finalize or fix a load before confirming it.
Left Panel Tabs
On the left, there are three tabs to help you focus on specific types of loads:
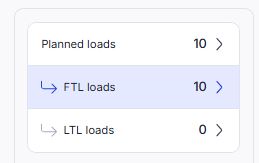
- Planned Loads: This is the default view showing all loads created during this planning run. Use this when you want to review the overall plan before taking any action.
- FTL Loads (Full Truck Loads): Displays only the loads planned as full truck movements.
- These usually have high utilization and lower cost-per-order.
- Use this view to validate efficient, high-volume movements.
- LTL Loads (Less-than Truck Loads): Displays loads that couldn’t be filled to full capacity and are planned as partial truck movements. Use this view to explore opportunities for consolidation or cost optimization.